Making Easter decorations with children
Cute Easter eggs you can make with children
It’s great to make Easter decorations together with children or grandchildren.
What you need:
- Cardboard – I used the front cover of an old magazine
- Scissors
- Glue, such as a glue stick
- Fabric scraps
- Remnants of embroidery thread or yarn
- Thick needle with a point
- Label from Label Yourself
Instructions:
Draw an egg-shaped template yourself or print out our templates. Cut out the template(s) you want to use.
Trace the outline of the template onto a piece of cardboard. Cut out the egg-shaped figure. Find or cut a piece of fabric that matches the template. The fabric scrap must be larger than the egg.


Glue the entire surface. Place the fabric over the cardboard and press it firmly. Do the same on the opposite side. Once the glue is dry, you can trim off any excess fabric. Now you have a beautiful egg.


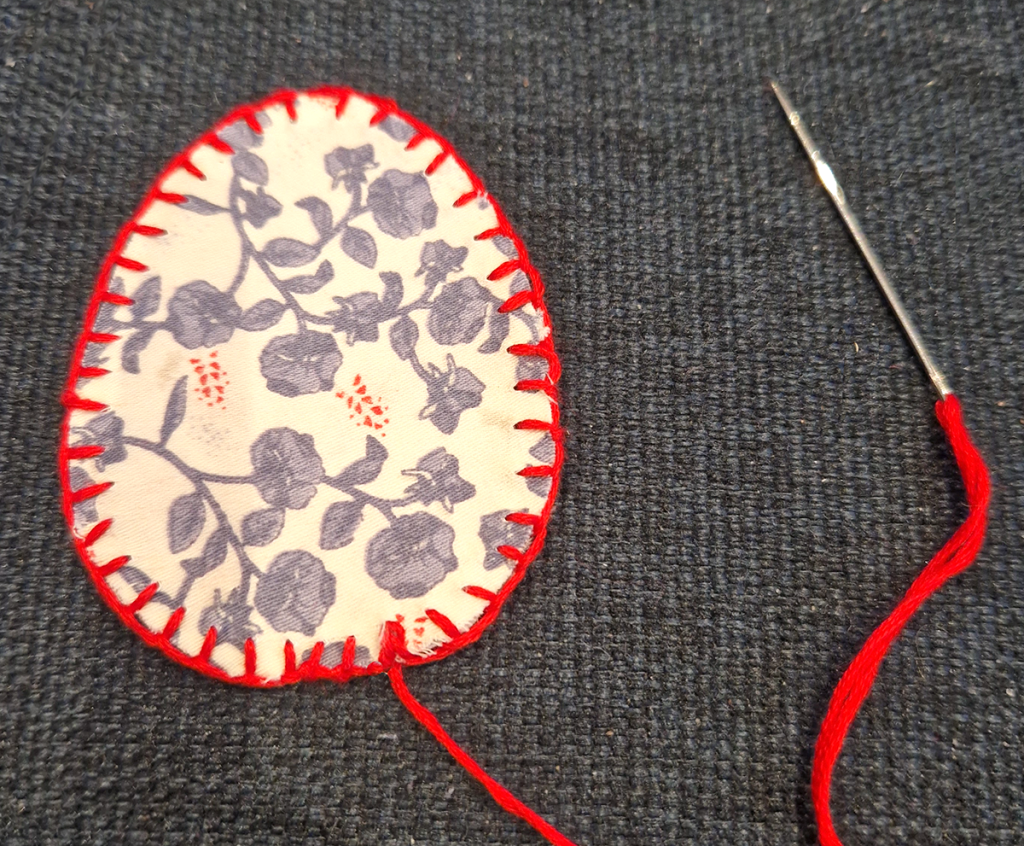
Now you will sew along the edge. Choose a contrasting color or one of the colors in the fabric. I have sewn with a blanket stitch, which gives a very nice effect and “frames” the egg. It is helpful to make holes in the egg before sewing. This will also make it easier for a child to sew the stitches.
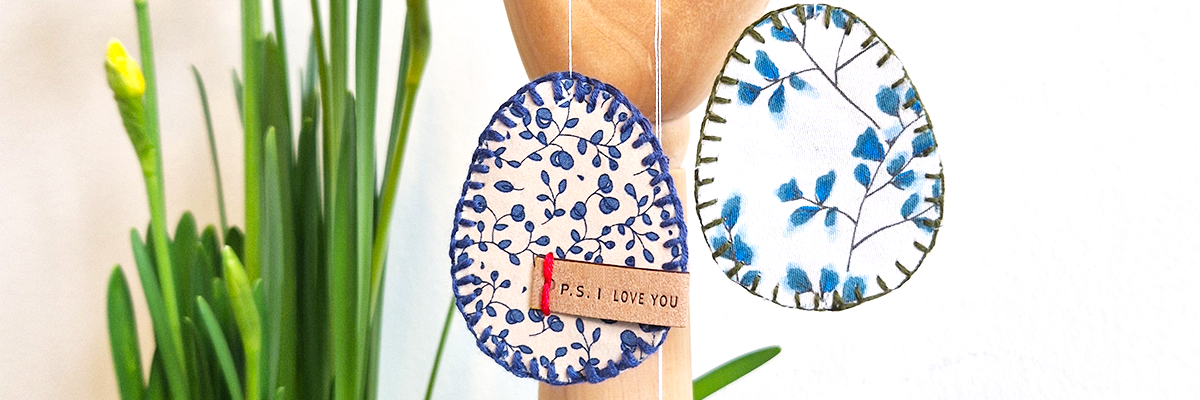
Finally, I have attached a label to one of the Easter eggs with the text “Handmade” on one side and “I Love You” on the other. This gives the eggs an extra finish, so they can now be used as Easter gifts.

Make more eggs in different sizes and hang them on a branch or in the window. You can also decorate the eggs with markers, glue on buttons, or decorate them however you like.

Optionally, put a name label on the Easter eggs that the child has made. This way, you can recognize the child’s Easter egg in the years to come.
Try the Danish tradition: “gækkebrev”
If you’re making Easter decorations with children or grandchildren, you can try the Danish tradition of crafting “gækkebrev.”
A gækkebrev is a beautiful paper cutout. The sender writes a small rhyme or poem on the paper cutout. Instead of writing the sender’s name, they write dots. For example, if your name is Anna, you would write four dots. Here’s an example of how to create a gækkebrev.

In Denmark, we send one of the first spring flowers, snowdrops (vintergæk), along with the letter. It’s the snowdrop that has given the gækkebrev its name. “To play a trick on someone” or “drive gæk” with someone means to mislead or play a prank on them.
The finished gækkebrev is sent or delivered to grandparents, parents, or friends in their mailbox. They should not know who it’s from. If the recipient guesses that the gækkebrev is from you, you should give them an Easter egg. But if no one guesses that it’s from you, you reveal yourself at Easter. Then the recipient should give you an Easter egg.
Another suggestion for gækkebrev is to create stickers at Label Yourself and attach them to the gækkebrev. Line from kreativmedungerne.dk and her children have made stickers to put on the gækkebrev.

Design the lovely stickers to attach to the gækkebrev at Label Yourself